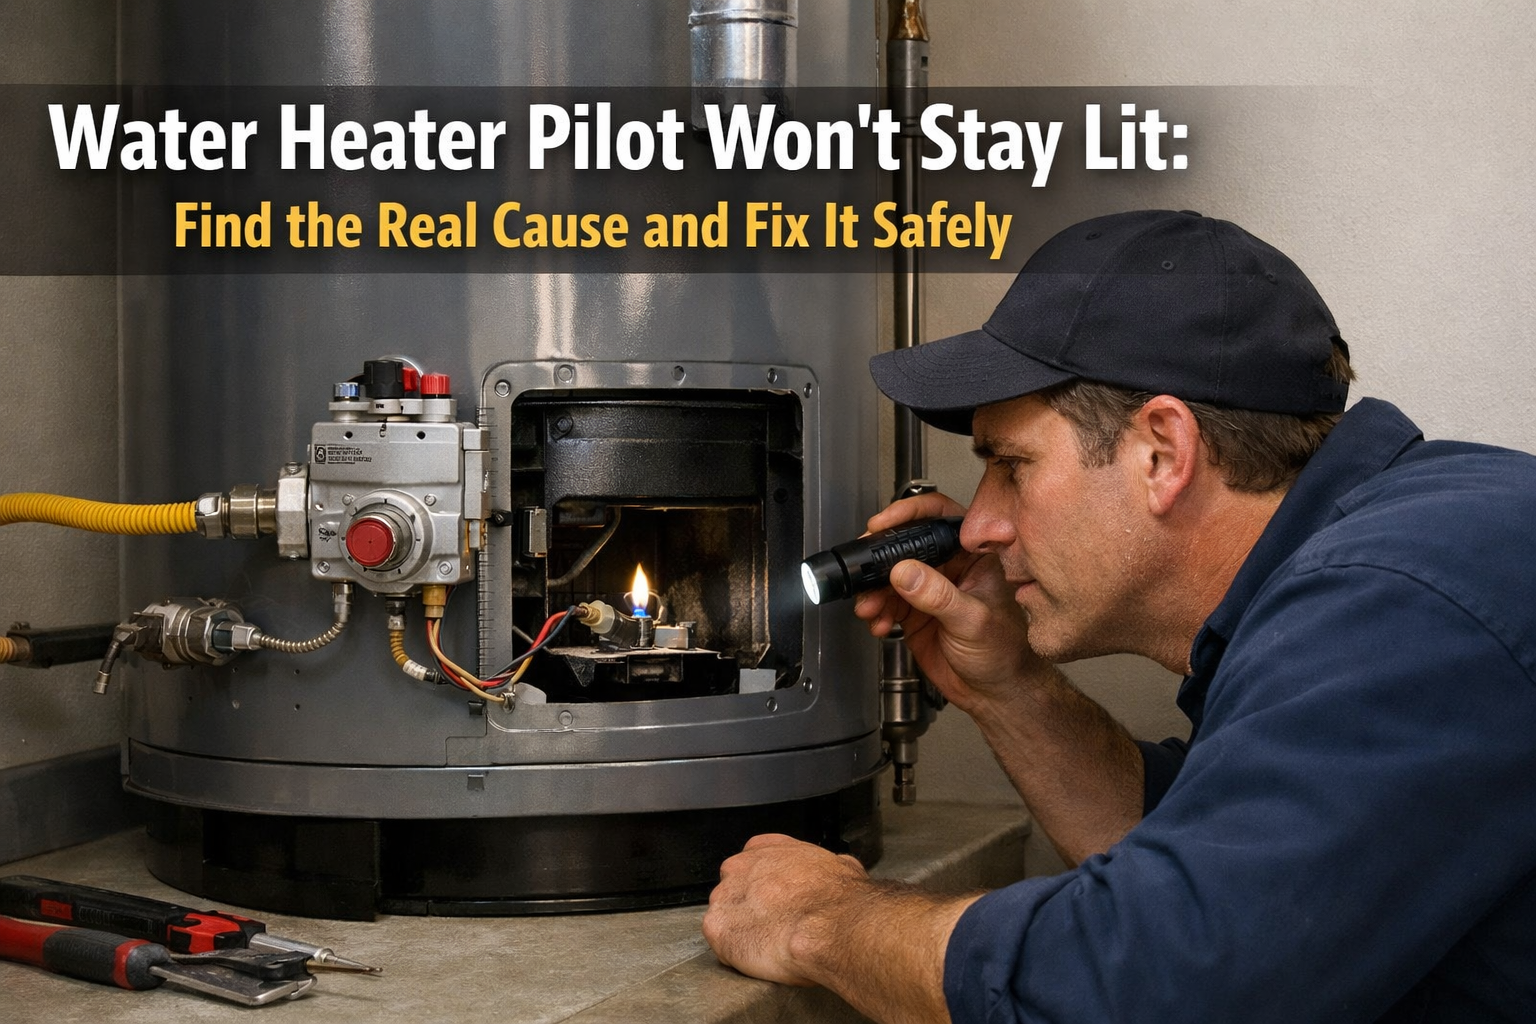
A gas water heater pilot that lights but will not stay lit is usually experiencing a problem with the pilot flame, flame-sensing circuit, combustion-air supply, venting system, gas control, or fuel supply. The pilot may ignite normally, but the heater will shut off the gas if it cannot confirm a stable flame or if a safety control detects an unsafe operating condition.
The timing of the failure is one of the most useful diagnostic clues. A pilot that goes out immediately when the control is released suggests a different failure path from one that stays lit until the main burner starts or shuts down only after several minutes.
Important: This guide applies mainly to gas-fired tank water heaters with a standing pilot or pilot-based gas control. Electronic-ignition, power-vent, direct-vent, tankless, and model-specific systems may use different components and diagnostic procedures. Always follow the lighting instructions printed on the heater or provided in the manual for its exact model number.
What to Do First: Gas Water Heater Safety
Do not repeatedly attempt to relight the pilot until you have checked for signs of a gas leak, abnormal combustion, water intrusion, venting trouble, or another unsafe condition.
If You Smell Gas
If you smell sulfur or rotten eggs, hear escaping gas, or otherwise suspect a gas leak:
- Do not light the pilot or operate another appliance.
- Do not turn electrical switches on or off.
- Do not use a telephone inside the building.
- Do not smoke, create a flame, start a vehicle, or use anything that could produce a spark.
- Leave the building immediately and take everyone with you.
- From a safe location, call 911 and the local gas utility.
- Do not return until emergency personnel or the utility confirms that it is safe.
The U.S. Consumer Product Safety Commission’s gas-leak guidance also advises leaving immediately and avoiding lights, phones, and other electronics before exiting.
Stop Relighting the Heater and Arrange Service If
- the pilot repeatedly goes out after you follow the manufacturer’s lighting instructions;
- the flame is unusually large, lifting, unstable, persistently yellow, or producing soot;
- the heater produces delayed ignition, a small explosion, or a loud “whoomp” when the burner starts;
- water is entering the burner compartment;
- the gas-control status light displays a fault code;
- the pilot goes out when the main burner starts;
- the burner, draft hood, or venting system behaves unpredictably; or
- a carbon-monoxide alarm activates.
Carbon-monoxide warning: If a carbon-monoxide alarm sounds, move everyone outside to fresh air and call 911. Possible symptoms include headache, dizziness, weakness, nausea, vomiting, sleepiness, and confusion. Do not re-enter the building or operate the water heater until emergency responders permit entry and the appliance has been inspected by qualified personnel.
See the CPSC carbon-monoxide fact sheet for alarm-response and appliance-safety guidance.
Quick Diagnosis: When Does the Pilot Go Out?
The pattern below can help narrow the system that requires testing. It does not prove that a specific component has failed.
| What happens | Possible failure path | What to check next |
|---|---|---|
| Pilot goes out immediately when the control button or knob is released | Insufficient thermocouple or thermopile output, poor flame contact, loose connection, open safety circuit, incorrect lighting procedure, or gas-control fault | Confirm that the exact model instructions and required hold period were followed, then have the flame-sensing circuit tested if the problem continues |
| Pilot remains lit briefly, then gradually weakens and goes out | Weak pilot flame, restricted pilot flow, unstable gas supply, or incomplete heating of the flame sensor | Observe the flame through the viewing window and record whether it weakens before shutdown |
| Pilot stays lit until the main burner ignites | Pilot-flame disturbance, flame lifting, combustion-air restriction, gas-pressure change, or loss of flame sensing | Have the pilot assembly, burner, combustion-air supply, gas pressure, and gas control inspected |
| Pilot goes out after the main burner has operated for several minutes | Combustion-air restriction, venting problem, thermal-switch response, overheating, or an intermittent control fault | Stop repeated relighting and arrange combustion, venting, and safety-control diagnosis |
| Pilot failure occurs during windy weather or while exhaust equipment is already operating | Draft interference, building depressurization, backdrafting, or venting disturbance | Record the conditions without deliberately reproducing them, then have the draft hood, vent connector, and combustion-air supply evaluated |
| Pilot works again after the heater cools, then fails later | Heat-related control failure, thermal safety response, restricted airflow, or overheating | Record the timing and any status-light pattern, then request model-specific diagnosis |
| Pilot operates inconsistently without a repeatable pattern | Loose connection, intermittent gas control, variable gas pressure, damaged pilot assembly, or another intermittent fault | Have the system tested instead of replacing components by trial and error |
This timing-based approach is more useful than assuming every pilot problem is caused by a failed thermocouple. The failure pattern identifies the system that requires further testing; it does not prove which individual part is defective.
If the heater fails earlier in the ignition sequence—such as producing no spark, no pilot flame, or repeated unsuccessful ignition attempts—see our water heater ignition failure guide.
How the Pilot Safety System Keeps Gas Flowing
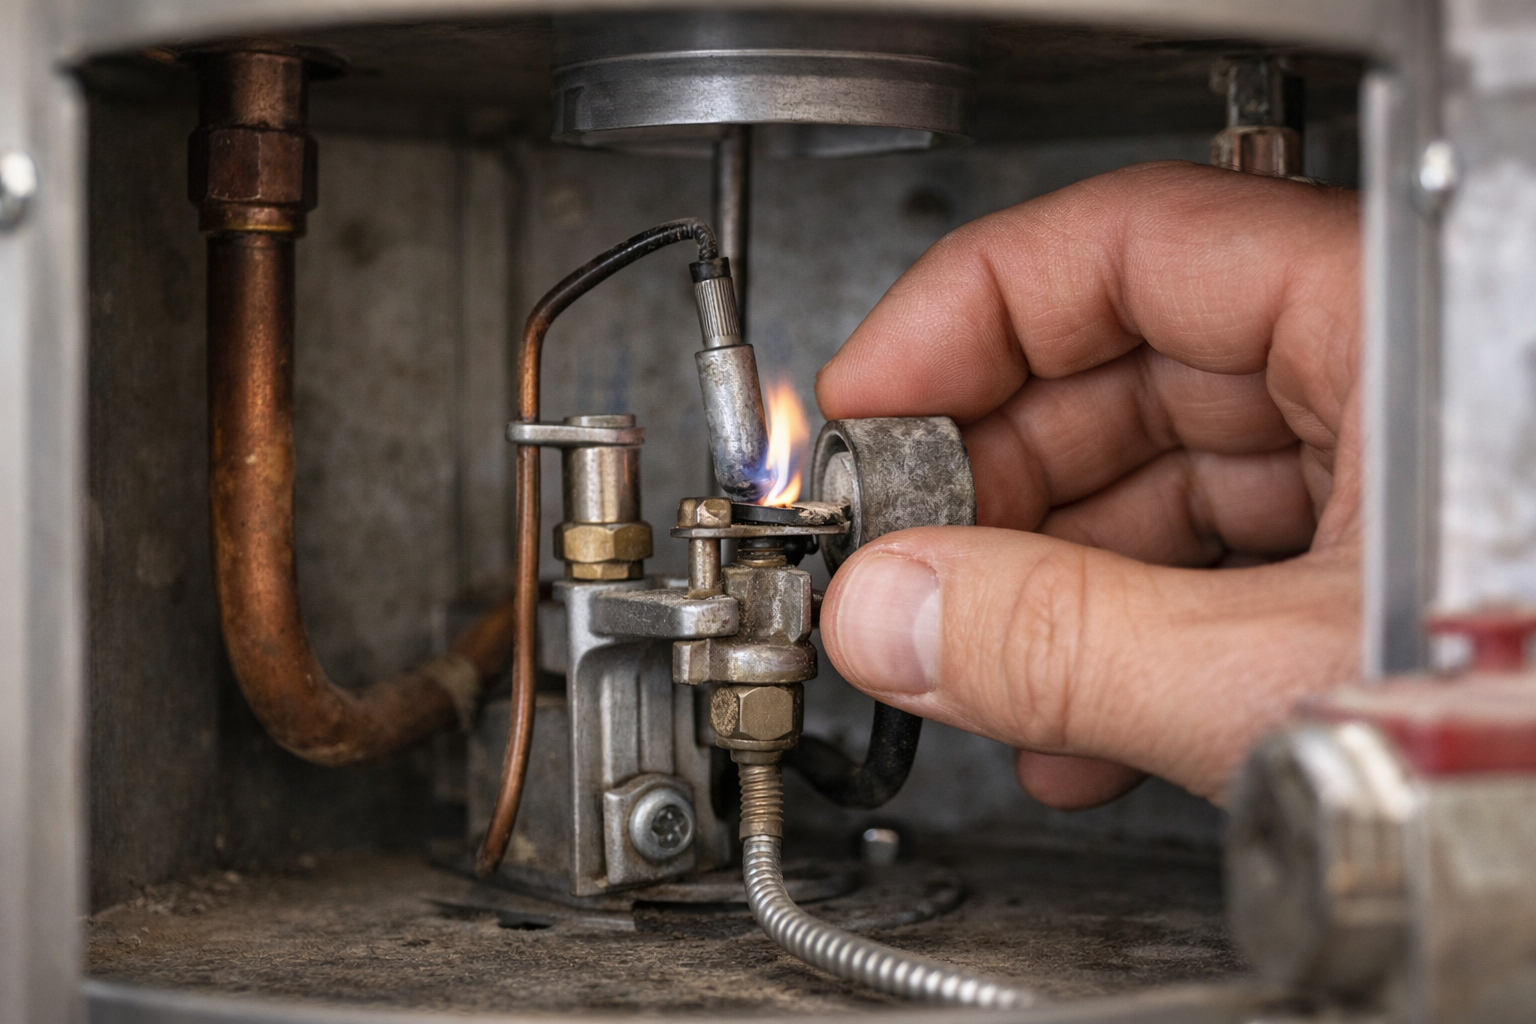
On a traditional standing-pilot water heater, pressing and holding the pilot control temporarily allows gas to reach the pilot burner. Once the pilot ignites, its flame heats or activates the heater’s flame-sensing component.
Depending on the model, the flame-sensing and ignition system may include:
- a thermocouple;
- a thermopile;
- a separate flame-sensing rod;
- a spark igniter;
- a thermal switch or another safety device; or
- an integrated pilot assembly containing several of these components.
A thermocouple or thermopile generates a small electrical signal when heated by the pilot flame. That signal allows the safety mechanism inside the combination thermostat and gas control to continue supplying pilot gas. If the signal is too weak, interrupted, or not recognized by the control, the valve closes and the pilot goes out.
A. O. Smith explains that a damaged thermocouple or thermopile can prevent the pilot safety valve from receiving the signal needed to remain open. See its pilot-light and flame-sensor guidance.
This shutdown is an intentional safety function. It helps prevent unburned gas from continuing to flow when the pilot flame is absent or cannot be reliably confirmed.
Thermocouple and Thermopile Are Not Interchangeable Terms
Although the terms are sometimes used loosely, a thermocouple and a thermopile are not necessarily the same component.
- A thermocouple uses a thermoelectric junction to produce a small millivolt safety signal when heated.
- A thermopile combines multiple thermoelectric junctions and can produce a higher millivolt output for the gas control.
- Some heaters use a complete pilot assembly containing the sensor, igniter, wiring, thermal protection, and pilot burner.
The correct component, output specification, connection, and replacement procedure depend on the water heater’s model and serial number. Do not order a replacement solely because a part is advertised as a “universal water heater thermocouple.”
Millivolt pass/fail values are not universal. They differ by thermocouple, thermopile, gas-control design, and whether the test is performed open-circuit or under load. A technician should compare the reading with the service manual for the exact heater and gas control.
What a Healthy Pilot Flame Should Look Like
Viewed through the manufacturer-provided window, a healthy pilot flame is generally steady, predominantly blue, and positioned to heat or engage the flame-sensing component as designed. Exact flame shape and color can vary with the pilot assembly, fuel type, altitude, and manufacturer specifications.
| Flame observation | What it may indicate |
|---|---|
| Small or weak pilot flame | Restricted pilot flow, low gas pressure, pilot contamination, incorrect fuel setup, or another supply problem |
| Flame does not adequately reach the sensing area | Weak gas flow, a damaged or misaligned pilot assembly, or incorrect component positioning |
| Flickering, wandering, or lifting flame | Draft interference, unstable gas pressure, combustion-air disturbance, or venting interaction |
| Flame moves away from the sensor when the main burner starts | Burner and pilot interaction, airflow disturbance, gas-pressure change, or loss of flame sensing |
| Persistent yellow flame, soot, or visible carbon deposits | Contamination, restricted combustion air, incorrect fuel-air mixture, or another combustion problem |
Flame appearance is a diagnostic clue, not a conclusive diagnosis. Do not insert wire into the pilot orifice, enlarge its opening, disconnect pilot tubing, adjust gas pressure, or remove a sealed burner door in an attempt to change the flame.
What You Can Safely Try Before Calling a Technician
The following steps do not require opening the burner compartment or disturbing a gas connection. Stop immediately if you smell gas, a carbon-monoxide alarm sounds, water is entering the burner area, or the flame or burner behaves abnormally.
1. Follow the Exact Lighting Label
Read the lighting instructions attached to the water heater before attempting a relight. The control sequence, waiting period, igniter procedure, hold time, status-light behavior, and maximum number of attempts vary by model.
Releasing the pilot control before the required hold period has elapsed can look like a failed thermocouple or thermopile because the sensor may not yet be hot enough to hold the safety valve open.
2. Observe the Required OFF Waiting Period
Turn the gas control to OFF and wait for the full period stated on the heater’s lighting label before attempting another relight. Many labels require at least five minutes, while some manufacturer guidance specifies a longer period. The instructions on the exact heater take priority.
If the label is damaged, missing, or unreadable, do not improvise. Locate the manual using the model number or contact the manufacturer or a qualified technician.
3. Record the Status-Light Pattern
Record the number, color, duration, and sequence of any flashes before resetting the control. Status-light codes are not universal; the same flash pattern can mean different things on different gas valves.
Bradford White describes its ICON gas-control light as a troubleshooting feature intended to assist plumbing professionals. See its gas-valve status-light guidance.
4. Check Accessible Exterior Air Openings
Remove stored items from around the heater and check whether accessible exterior air openings are visibly covered by heavy dust, lint, or pet hair.
Some A. O. Smith FVIR models use an external wrap-around filter that the manufacturer permits homeowners to clean with a vacuum without removing the filter. This instruction applies only to heaters equipped with that specific filter design. Do not open the burner door, reach into the combustion chamber, or attempt to clean the internal flame arrestor.
See A. O. Smith’s FVIR filter and flame-arrestor guidance and follow only the instructions that match the exact heater model.
5. Record Existing Draft Conditions
Note whether the problem already occurs during strong wind or while a range hood, bathroom fan, clothes dryer, fireplace, or HVAC system is operating. Do not deliberately switch equipment on to reproduce suspected backdrafting or combustion-gas spillage.
6. Stop After the Permitted Attempts
Follow the attempt limit and reset procedure printed on the heater. Some controls enter a safety lockout after repeated failed ignition attempts. Continuing beyond the manufacturer’s instructions can allow gas accumulation or conceal the failure pattern needed for diagnosis.
If the pilot still will not remain lit after the permitted attempts, stop and arrange service. Do not open the burner compartment, disconnect gas tubing, reset or bypass safety switches, or replace components by guesswork.
Work That Requires a Qualified Technician
- testing thermocouple or thermopile millivolt output;
- removing, cleaning, or adjusting the pilot orifice;
- disconnecting pilot, manifold, or supply gas tubing;
- testing inlet or manifold gas pressure;
- adjusting pilot or main-burner gas flow;
- replacing the combination thermostat and gas-control valve;
- opening or servicing a sealed FVIR burner compartment;
- resetting, testing, or replacing thermal switches and other safety controls;
- replacing burner-door gaskets or sealed-combustion components;
- diagnosing draft, backdrafting, vent spillage, or combustion performance; and
- performing gas-leak and combustion tests after service.
Improper reassembly of the burner door, gasket, viewport, pilot tubing, or gas connections can create fire, explosion, and carbon-monoxide hazards. Internal burner and gas-control work should not be treated as routine homeowner maintenance.

Why a Water Heater Pilot Will Not Stay Lit
A water heater pilot can repeatedly go out because of a problem with the flame-sensing circuit, pilot flame, gas supply, combustion-air system, venting, gas control, or a model-specific safety device. Several faults can produce nearly identical symptoms, so the failed component should be tested rather than selected from a generic troubleshooting list.
Thermocouple, Thermopile, or Flame-Sensing Failure
A thermocouple or thermopile must receive enough heat from the pilot flame to produce the electrical signal required by the combination thermostat and gas control. The pilot may go out when the control is released if:
- the sensing component is worn, damaged, contaminated, or incorrectly positioned;
- the pilot flame does not adequately heat the sensing area;
- a wire, plug, terminal, or threaded connection is loose or damaged;
- the thermocouple or thermopile output is below the exact model specification;
- a thermal switch or another safety device has opened the circuit; or
- the gas control cannot recognize or hold the flame-safety signal.
A sensor that appears dirty is not automatically defective. Installing a new sensor will not correct a weak pilot flame, loose connection, open safety circuit, fuel-supply problem, or failed gas control.
Millivolt pass/fail values vary by heater, sensor, control design, and test method. Bradford White service manuals, for example, contain different model-specific thermocouple and thermopile procedures. A technician should compare the test result with the service manual for the exact heater rather than applying one universal number.
Weak, Restricted, or Misdirected Pilot Flame
The pilot may ignite but fail to heat the flame sensor adequately when the flame is weak, unstable, restricted, or incorrectly positioned.
Possible causes include:
- dust, lint, corrosion, or debris in the pilot assembly;
- a partially restricted pilot orifice;
- a damaged or misaligned pilot burner;
- low or fluctuating inlet gas pressure;
- air in the gas line following service or a supply interruption;
- a kinked, damaged, or improperly connected pilot tube;
- a pilot component that does not match the heater model; or
- an incorrect natural-gas or propane configuration.
Do not insert a needle, drill bit, or wire into the pilot orifice. Its opening is calibrated for a specific fuel flow. Enlarging or damaging it can produce an oversized flame, soot, delayed ignition, improper combustion, or elevated carbon-monoxide production.
Pilot tubing, gas pressure, fuel conversion, and internal burner components should be inspected and serviced by a qualified gas-appliance technician.
Combustion-Air or FVIR Restriction
Many modern atmospheric gas water heaters use a flammable-vapor ignition-resistant system, commonly abbreviated as FVIR. These heaters draw combustion air through screened openings and a flame arrestor near the bottom of the appliance.
Lint, dust, pet hair, stored materials, and debris around the heater’s air openings can restrict airflow. Depending on the model, inadequate combustion air may:
- produce a weak or unstable pilot flame;
- disturb the pilot when the main burner starts;
- cause incomplete combustion or soot;
- activate a thermal cutoff or resettable safety switch; or
- shut the heater down after it operates for several minutes.
A homeowner can keep the surrounding floor and accessible exterior air openings clear. Removing a sealed burner door, servicing the internal flame arrestor, disturbing burner-door gaskets, or resetting a safety device should not be treated as routine DIY maintenance.
A. O. Smith separates basic intake cleaning from advanced combustion-chamber service and advises using a qualified person when the required skills are lacking. See its FVIR flame-arrestor cleaning guidance.
Draft, Venting, or Building-Pressure Problems
An atmospheric gas water heater requires adequate combustion air and a venting system that carries combustion gases safely outdoors. Pilot or burner operation may become unstable when:
- the draft hood or vent connector is loose, damaged, obstructed, or incorrectly installed;
- the chimney or vent does not establish reliable draft;
- strong wind affects the vent termination;
- a range hood, bathroom fan, clothes dryer, fireplace, or HVAC system depressurizes the room;
- the heater is installed in an undersized or tightly enclosed space; or
- the appliance does not receive adequate combustion air.
A pilot that fails mainly during windy weather or while exhaust equipment is already operating may point toward a draft or building-pressure interaction. It does not prove that the thermocouple is defective.
Do not deliberately run fans or appliances to reproduce suspected backdrafting. Vent spillage and combustion gases can create a carbon-monoxide hazard. Draft testing, combustion analysis, vent correction, and chimney inspection should be performed by a qualified professional.
Main-Burner and Pilot-Flame Interaction
A particularly useful diagnostic pattern occurs when the pilot remains stable by itself but goes out as soon as the main burner ignites.
Possible explanations include:
- the main burner disturbing or lifting the pilot flame;
- a change in gas pressure when the main burner demands fuel;
- restricted combustion air;
- incorrect pilot or burner positioning;
- loss of flame contact with the sensing component; or
- a model-specific flame-sensing or control fault.
This pattern does not automatically identify a bad gas control or thermocouple. The pilot assembly, burner interaction, gas pressure, combustion-air supply, and flame-sensing circuit may all require testing.
Gas-Control Valve or Safety-Circuit Failure
The combination thermostat and gas-control valve regulates pilot gas, main-burner gas, water temperature, and multiple safety functions. A control or safety-circuit fault may be suspected when:
- the pilot flame is strong and correctly positioned but will not remain lit;
- the thermocouple or thermopile produces the required signal but the control still closes;
- the status light displays a model-specific fault code;
- the pilot or burner operates intermittently without a repeatable flame problem;
- the temperature control behaves abnormally;
- a thermal cutoff, reset switch, or another safety circuit remains open; or
- the gas control repeatedly enters ignition lockout.
A status-light code can narrow the diagnostic path, but it does not automatically prove that the gas-control valve must be replaced. Sensor output, wiring, safety switches, gas pressure, pilot operation, and combustion conditions may need to be tested first.
Bradford White explains that its gas-control indicator lights assist professional troubleshooting and are model-specific. See its gas-valve status-light guidance.
Gas-Supply or Fuel-Configuration Problems
Low inlet pressure, an interrupted fuel supply, regulator trouble, an undersized gas line, or an incorrect natural-gas or propane configuration can create a weak or inconsistent pilot flame.
A fuel-supply problem may become more noticeable when:
- the main burner attempts to ignite;
- another gas appliance begins operating;
- utility supply pressure changes;
- a propane cylinder is low or its regulator malfunctions; or
- the heater has been fitted with an incorrect pilot or burner component.
Gas pressure must be measured with suitable equipment and compared with the heater’s rating plate and manufacturer specifications. Do not adjust a regulator or gas-control valve based solely on flame appearance.
Water, Condensation, or Tank Leakage Near the Burner
Water around the combustion chamber should not automatically be dismissed as humidity. Possible sources include:
- temporary condensation during cold startup;
- flue-gas condensation;
- a leaking water connection above the heater;
- water entering through a damaged or incorrectly installed vent;
- a leaking temperature and pressure relief valve or discharge pipe;
- a leaking drain valve; or
- corrosion or leakage from the storage tank.
Moisture can disturb the pilot flame, corrode electrical connections, damage burner components, or activate a safety device. If water is entering the burner compartment or the source is unclear, stop repeated relighting and have the heater inspected.
Water Heater Pilot-Light Repair Costs
The figures below are national planning ranges rather than fixed prices. Local labor rates, diagnostic time, heater access, warranty coverage, model-specific parts, fuel type, and emergency scheduling can significantly affect the final bill.
| Service or repair | Typical planning range | What may be included |
|---|---|---|
| Minimum service or diagnostic call | $50–$200 | Dispatch, visual inspection, status-code review, flame observation, and initial diagnosis |
| Thermocouple or thermopile replacement | $100–$325 | Compatible component, labor, connection checks, relighting, and operational testing |
| Basic pilot relighting or minor pilot service | $50–$200 | Lighting procedure, basic inspection, and minor service where no major component is replaced |
| Integrated pilot-assembly replacement | $150–$450 | Model-specific pilot burner, sensor, igniter, wiring, seals, and labor; highly model-dependent |
| External intake cleaning or minor burner service | $150–$350 | Estimated range for diagnosis, approved cleaning, reassembly, leak testing, and operational checks |
| Gas-control valve replacement | $150–$550+ | Model-specific control, draining when required, gas connections, setup, and testing |
| Venting or combustion-air correction | $200–$1,000+ | Highly variable; depends on the vent defect, chimney condition, access, route, and materials |
A. O. Smith gives approximately $200 as a basic example of professional thermocouple or thermopile repair and approximately $20 for the part alone. That part-only figure does not include diagnosis, labor, sealed-burner access, leak testing, or model-specific service requirements.
See A. O. Smith’s water-heater repair guidance.
Before authorizing a repair, ask whether the quote includes:
- the diagnostic or service-call fee;
- the exact model-specific replacement component;
- thermocouple, thermopile, or safety-circuit testing;
- inlet or manifold gas-pressure testing;
- burner-door gaskets and required seals;
- gas-leak and combustion testing after reassembly;
- venting or combustion-air work;
- after-hours or emergency fees; and
- manufacturer warranty coverage or manufacturer-supplied parts.
Warranty check: Locate the model and serial number before approving the repair. A replacement pilot assembly, gas control, or sensor may be covered by the manufacturer’s parts warranty even when diagnosis, labor, shipping, or installation is not covered.
Should You Repair or Replace the Water Heater?
A pilot-light problem does not automatically justify replacing the entire heater. An isolated thermocouple, thermopile, pilot assembly, or external airflow problem may be economical to repair when the tank remains structurally sound.
Repair Usually Makes Sense When
- the fault has been traced to one replaceable sensor, pilot, or control component;
- the storage tank is not leaking or heavily corroded;
- the heater has otherwise operated reliably;
- the repair is covered fully or partly by the manufacturer’s warranty;
- the correct replacement component is readily available;
- the venting and combustion-air systems are safe; and
- the repair cost is modest compared with installing an equivalent heater.
Compare Replacement When
- the storage tank is leaking or visibly corroded;
- the gas control, pilot assembly, or other components have failed repeatedly;
- the required parts are obsolete, unavailable, or unusually expensive;
- the heater has a history of unreliable ignition, venting, or temperature control;
- major venting or installation corrections are also required;
- the heater is near the end of its practical service life and has other defects; or
- the repair represents a substantial share of the cost of a suitable replacement.
Do not use age alone as an automatic replacement rule. Consider tank condition, repair history, warranty status, parts availability, efficiency, installation safety, and the consequences of another failure.
Compare the estimate with our complete water heater replacement cost guide before approving an expensive gas-control, pilot-assembly, or venting repair.
Why Replacing the Thermocouple May Not Solve the Problem
A common troubleshooting mistake is replacing the flame sensor without confirming that the pilot flame can heat it correctly.
Consider this example:
- The pilot ignites while the control is held.
- The flame appears small and reaches only the edge of the sensing area.
- The control is released and the pilot goes out.
- A replacement thermocouple is installed, but the same failure returns.
- Further testing identifies restricted pilot flow or an unstable pilot assembly.
In this situation, the original thermocouple may not have been the primary fault. The weak pilot flame prevented both the original and replacement sensors from producing a reliable signal.
The opposite can also occur. A pilot flame may look acceptable through the viewing window, but the sensor may produce inadequate output, a safety switch may remain open, or the gas control may fail to hold the signal. Visual inspection is useful, but it does not replace model-specific testing.
How to Reduce Future Pilot-Light Problems
Maintenance cannot prevent every component failure, but it can reduce airflow restrictions and reveal venting, combustion, or water-intrusion problems before repeated shutdowns occur.
- Keep boxes, chemicals, aerosols, gasoline, paint thinner, and other combustible or flammable materials away from the heater.
- Keep the surrounding floor and accessible air-intake openings free of heavy lint, dust, and pet hair.
- Do not cover the heater base, combustion-air openings, draft hood, or vent connector.
- Have recurring pilot failure, soot, flame lifting, or delayed ignition inspected promptly.
- Investigate water or condensation near the burner compartment.
- Use only model-specific replacement components approved for the heater and fuel type.
- Maintain carbon-monoxide alarms according to local requirements and their manufacturer’s instructions.
- Include burner, venting, draft, combustion-air, and gas-pressure checks in professional service when appropriate.
Use our water heater maintenance schedule to plan routine tank, burner, venting, safety-valve, and leak checks.
Related Problems That Can Resemble Pilot Failure
A gas water heater may produce no hot water even when the pilot remains lit. Other possible causes include:
- a main burner that does not ignite;
- a failed thermostat or gas control;
- inadequate fuel flow;
- a model-specific safety lockout;
- a damaged burner assembly;
- venting or combustion-air problems; or
- another water-heater system fault.
For broader diagnosis beyond the pilot assembly, see our guide to a hot water heater that is not working.
Frequently Asked Questions
Why does the pilot go out when I release the control knob?
The flame-sensing circuit may not be producing or delivering the signal needed to keep the pilot safety valve open. Possible causes include inadequate flame contact, insufficient thermocouple or thermopile output, a loose connection, an open safety switch, an incorrect lighting procedure, or a gas-control fault.
Can I clean the thermocouple myself?
Some older open-combustion designs provide easier access than sealed FVIR models, but accessing the sensor may still require disturbing the pilot assembly, burner door, gasket, or gas connections. Do not open a sealed burner compartment or disconnect gas tubing unless the manufacturer expressly permits the procedure and you are qualified to restore the assembly and perform the required leak and combustion tests.
Does a blue pilot flame prove the thermocouple is working?
No. A steady blue flame is encouraging, but it does not confirm adequate sensor output, a sound connection, a closed safety circuit, or a functioning gas control. These components may require model-specific electrical and operational testing.
Why does the pilot stay lit until the main burner starts?
The main burner may disturb the pilot flame, change local gas pressure or airflow, or expose an existing flame-sensing weakness. Pilot alignment, burner interaction, combustion-air restriction, gas-pressure instability, and control faults are possible causes.
How many times should I try to relight the pilot?
Follow the attempt limit and waiting period printed on the heater’s lighting label. Stop if the pilot repeatedly fails, gas is smelled, a carbon-monoxide alarm activates, the status light shows a fault, the burner behaves abnormally, or water is entering the combustion area.
Bottom Line
A water heater pilot that will not stay lit is usually a flame-confirmation or safety-shutdown problem, but that symptom alone does not identify the defective component.
- It goes out when the control is released: Check the model-specific lighting procedure, then test the flame-sensing and safety circuit.
- The pilot flame is weak or gradually fades: Inspect pilot flow, fuel supply, and the pilot assembly.
- It fails when the main burner starts: Inspect burner interaction, gas pressure, combustion air, and flame sensing.
- It fails after several minutes: Investigate thermal switches, airflow, venting, overheating, and intermittent controls.
- It works unpredictably: Use the status code and model-specific tests instead of replacing parts by guesswork.
- The tank is leaking or repair costs keep increasing: Compare the repair estimate with replacement.
Do not assume the thermocouple is defective simply because the pilot goes out. Identify when the failure occurs, record the pilot flame and status-light behavior, consult the exact model documentation, and have the relevant flame-sensing, gas, safety, combustion, and venting systems tested before approving a repair.