How to Drain a Water Heater (Correct Steps, Flush Method & Safe Restart)
Draining a water heater is deceptively simple—but small mistakes can lead to expensive repairs or burned heating elements.
Many homeowners follow basic “how-to” guides but skip the critical parts that actually protect the system: flushing sediment properly and refilling safely.
This guide ensures you maintain your water heater correctly while avoiding common hazards.
Quick Answer (Exact Step Sequence)
- Turn off power (electric) or set gas to pilot
- Shut off cold water supply
- Open a hot faucet to relieve pressure
- Attach hose to drain valve
- Open drain valve and empty tank
- Flush water heater sediment using cold water cycles
- Close valve and refill tank completely
- Restore power only after full refill
 Important: Turning power on before the tank is fully refilled can burn out your heating elements.
Before You Drain: Make the Right Call First
Not every water heater issue requires draining.
Situation | Drain Needed? | Why |
Yearly maintenance |
| Removes sediment buildup |
Popping noise |
| Sediment overheating |
No hot water |
| Could be thermostat or element failure |
Leaking tank |
| Structural issue—draining won’t fix |
Replacing unit |
| Required for removal |
 Yes
Yes No
NoDraining is maintenance, not a fix for mechanical failure. If water is already leaking, check:
Water Heater Leaking: Causes & Fixes
What Happens Inside the Tank During Draining
Understanding tank mechanics changes how you drain:
- Sediment settles at the bottom
- Heat compacts sediment over time
- Draining removes loose debris
- Flushing breaks hardened layers
If you only drain, most sediment stays behind. Proper flush cycles ensure your system is genuinely clean.
Sediment buildup is a common cause of overheating:
Water Heater Too Hot: Causes & Fixes
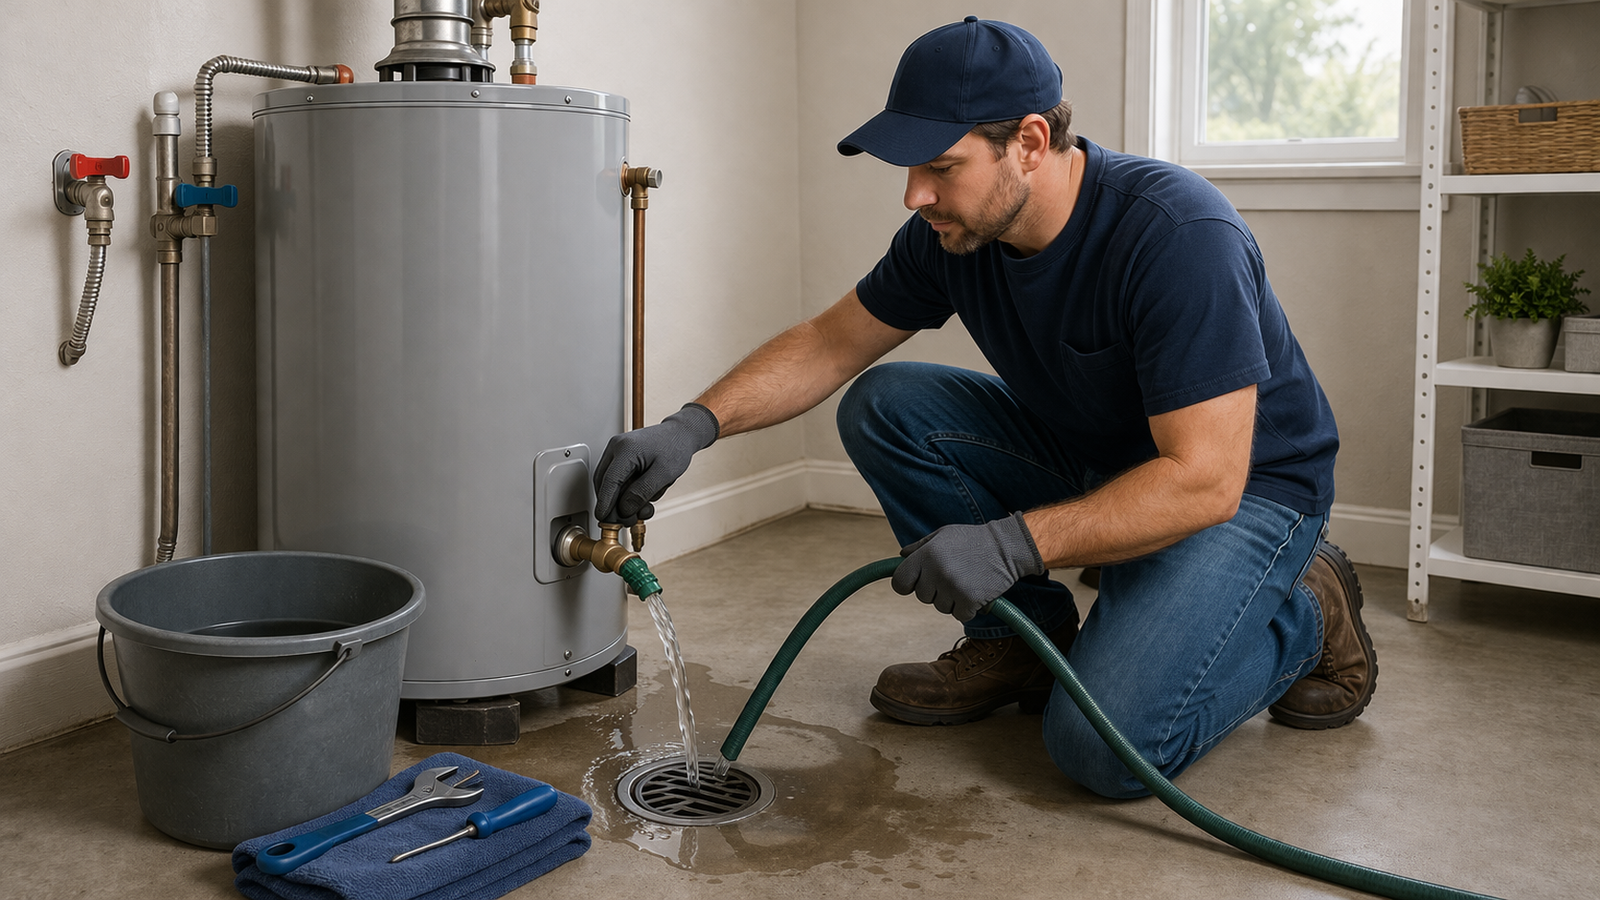
Tools Required for Safe Draining
- Garden hose
- Flathead screwdriver (if needed)
- Gloves (hot water risk)
- Safe drainage point
Setup rules:
- Keep hose lower than tank
- Avoid enclosed drainage areas
- Direct water safely away from flooring
Poor setup can cause water damage before maintenance even starts.
Step-by-Step: Drain Old Water Heater Safely
1. Shut Off Heat Source
Electric: turn off breaker
Gas: set to pilot
Prevents dry firing and element damage later.
2. Close Cold Water Supply
Stops water from entering the tank.
3. Open Hot Faucet
Allows air into the system.
Prevents vacuum lock and ensures smooth drainage.
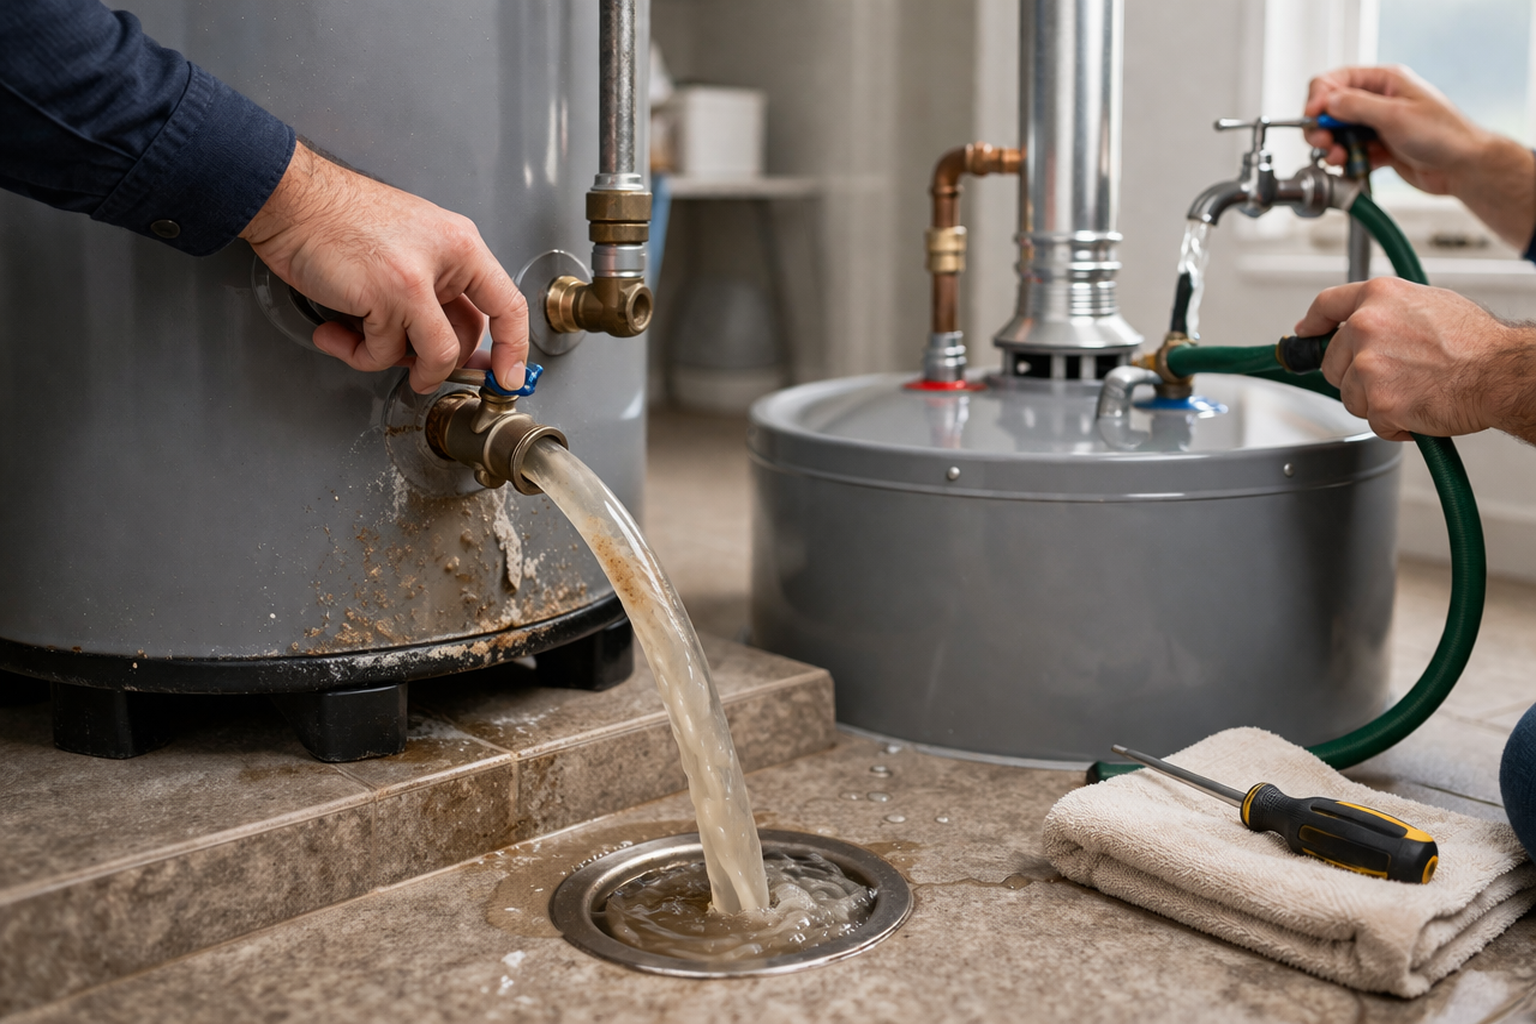
4. Connect Hose to Drain Valve
Attach hose at the bottom and route to:
- Floor drain
- Outdoor area
- Large container
5. Open Drain Valve Slowly
Normal: steady flow, cloudy water initially
Problem: no flow or weak trickle → likely blockage or vacuum lock
Flush Water Heater Sediment (Critical Step)
Proper flushing removes compacted sediment.
Steps:
- Let tank partially drain
- Turn cold water ON briefly
- Stir sediment inside tank
- Let dirty water exit
- Repeat 2–4 cycles until water runs mostly clear
Skipping this leaves sediment behind and leads to recurring problems.
Common Problems During Draining
- Drain valve leaks after closing
- Tank won’t refill fully
- Sediment blocks full drain
- Air trapped in system
- Heating element damage from dry firing
Most issues are tied to improper refill or skipped flushing.
If the Tank Won’t Drain
Likely causes:
- Sediment clog
- Vacuum lock
- Faulty valve
Solutions:
- Ensure hot faucet is open
- Briefly lift pressure relief valve
- Check hose for blockage
If it still won’t drain → stop forcing it. You are entering repair territory, potentially costly:
Water Heater Repair Cost
Water Heater Refill Procedure (Critical Safety Step)
Sequence:
- Close drain valve
- Remove hose
- Open cold water supply
- Keep hot faucet open
- Wait until steady water flow (no air)
- Close faucet
- Restore power or gas
Turning on power before full refill = instant element burnout.
Normal vs Warning Signs After Draining
Signal | Normal | Warning |
Water clarity | Light cloudy | Dark brown/rust persists |
Flow | Steady | Stops suddenly |
Noise | Minimal | Loud popping |
Smell | None | Metallic / sulfur |
Valve seal | Dry | Leaking |
Persistent issues usually indicate deeper maintenance neglect:
Water Heater Maintenance Schedule