
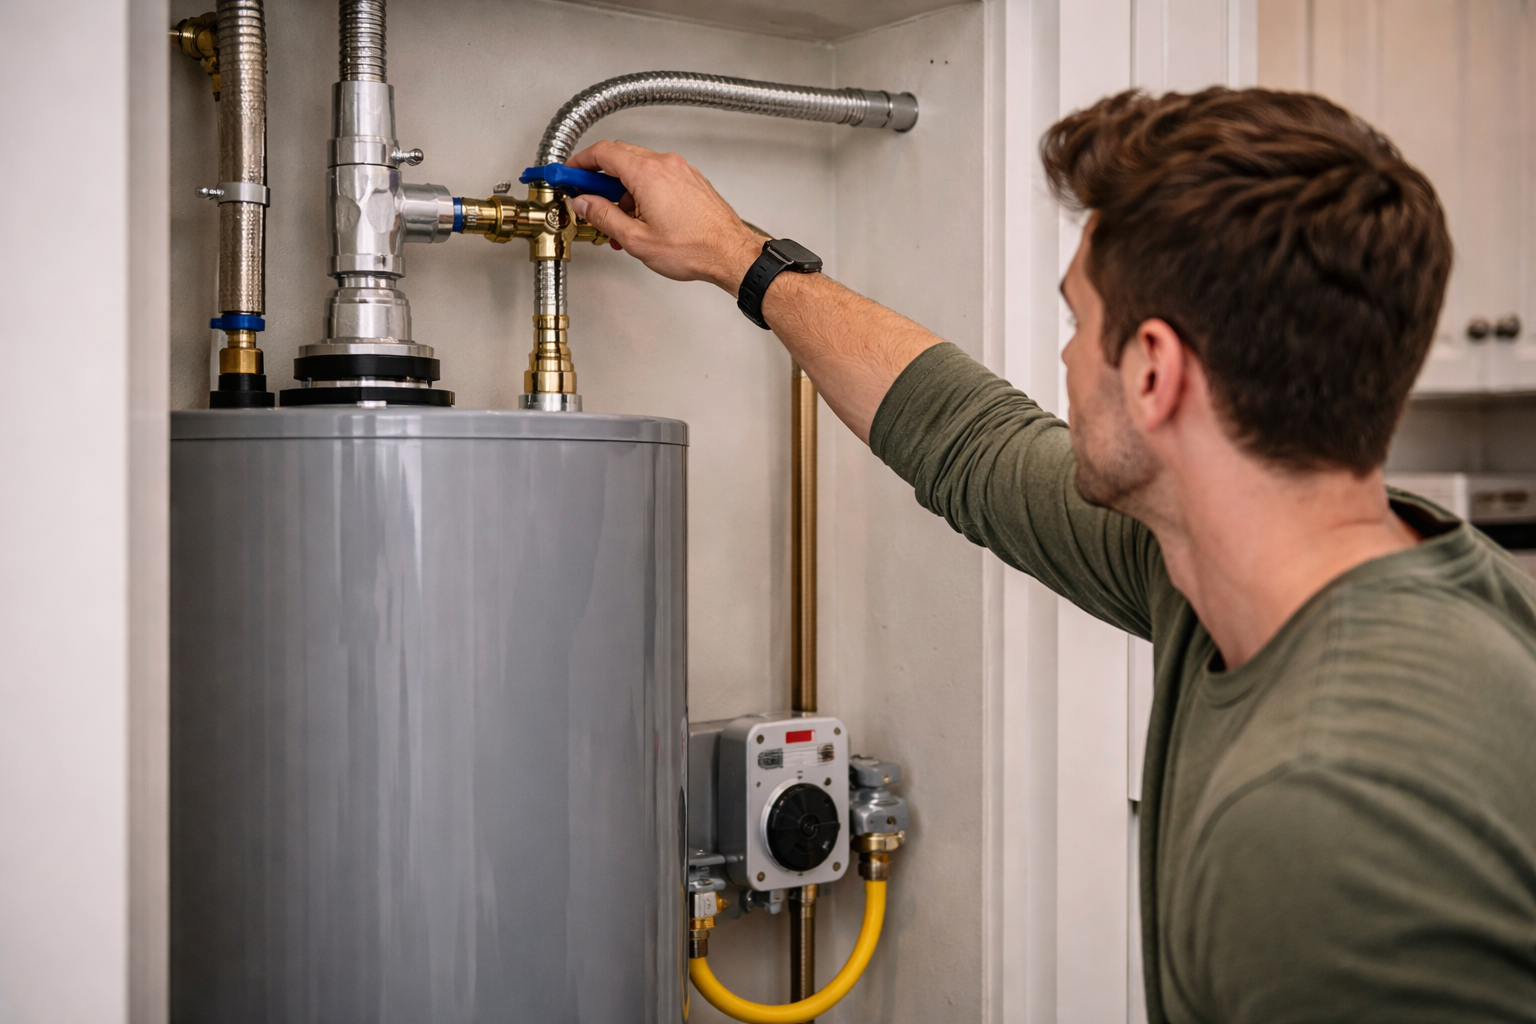
A water heater can have several pipes, valves and controls clustered around it, but only one normally stops new water from entering the unit: the cold-water inlet shut-off valve. On a conventional storage-tank water heater, this valve is commonly installed above or beside the tank on the pipe connected to the cold inlet. On a tankless water heater, it is usually beneath or beside the wall-mounted unit and may be part of an isolation-valve assembly.
The exact water heater shut-off valve location depends on the heater type, plumbing layout, installation age and local requirements. Do not identify a valve only by its handle shape, colour or pipe temperature. First confirm the cold-water inlet using the markings on the heater, the pipe routing or the installation manual for the exact model.
Quick answer
The water heater shut-off valve is normally located on the cold-water supply line near the heater.
- Storage-tank water heater: Look above or beside the tank near the connection marked COLD or INLET.
- Tankless water heater: Look beneath or beside the unit for the cold-water isolation valve, often grouped with a hot-side valve and service ports.
- Heat-pump water heater: Look for the plumbing valve on the cold-water inlet. The electrical breaker or disconnect is a separate control.
- Valve missing, stuck or unidentified: During an active water leak, use the home’s main water shut-off when it can be reached safely.
Where Is the Water Heater Shut-Off Valve?
The dedicated shut-off valve is installed in the branch line that supplies cold water to the heater. Its purpose is to isolate the water heater without normally shutting off cold water to the rest of the home.
The 2024 International Plumbing Code cold-water valve provision provides a useful model-code example. It calls for a valve in the cold-water branch line near the water heater that serves only that equipment, remains accessible and does not disrupt the cold-water supply to the rest of the system.
That model-code provision is not automatically the law in every location. The adopted code edition, local amendments, equipment listing, manufacturer instructions and interpretation of the local authority having jurisdiction can all affect an installation. See the complete guide to water heater code requirements for a broader explanation of that compliance framework.
For a conventional residential storage tank, begin by looking at the pipes connected to the top or side of the heater. One pipe supplies cold water to the tank, while the other carries heated water into the home. The shut-off valve is normally located on the cold supply side before the pipe enters the heater.
Do not rely on a universal measurement such as six inches, one foot or two feet above the tank. No single distance applies to every residential installation. Depending on the system, the valve may be:
- Directly above a top-connected storage tank
- Beside the tank on a horizontal section of pipe
- Near a side-mounted cold-water connection
- Higher on an exposed branch line near the ceiling
- Inside an accessible utility or plumbing compartment
- Beneath a wall-mounted tankless water heater
- Part of a tankless isolation and service-valve assembly
- Connected to a model-specific automatic leak-detection shut-off device
Closet, garage, basement and attic installations can route the piping differently. For location-specific access and safety considerations, see the guides to water heater closet code requirements and water heater attic code requirements.
How to Identify the Correct Cold-Water Valve
Use a clear identification process instead of turning the first handle you see. A water-heater installation can include a cold-water shut-off, gas appliance valve, drain valve, temperature-and-pressure relief valve, tankless service valves and other plumbing components.
Identify before you turn: First determine what the pipe carries. Next determine what the valve controls. Only then operate the valve if it is safe to do so.
1. Look for the Cold or Inlet Marking
Many water heaters identify their water connections with words such as COLD, COLD INLET or INLET. The cold connection may also have a blue marking. The hot outlet may be labelled HOT, OUTLET or marked in red.
Official manufacturer manuals commonly identify these connections and direct installers to place a shut-off valve in the cold-water supply line. For example, this Bradford White installation manual requires a shut-off valve in the cold-water supply line for the models it covers.
That manual should not be applied to every water heater. Always consult the installation and operating instructions for the exact make and model installed in the home.
2. Trace the Cold-Water Supply Pipe
Once the cold inlet has been confirmed, follow its pipe away from the heater. The dedicated shut-off should be located along that branch near the equipment and should remain accessible.
Do not assume that it is the only valve or component on the cold side. Depending on the plumbing system, the cold-water branch may also connect to or pass near:
- A thermal expansion tank
- A check valve or backflow device
- A pressure-reducing valve
- A mixing or tempering arrangement
- An automatic leak-detection valve
- A recirculation-system component
- Tankless isolation valves and service ports
3. Check the Exact Model Diagram
If the pipe connections are unclear, locate the model number and review the manufacturer’s installation manual. This is especially important for tankless, point-of-use, recirculating and heat-pump water heaters, where the plumbing layout may be less familiar than that of a conventional storage tank.
The model diagram may identify:
- The cold-water inlet
- The hot-water outlet
- The gas connection, where applicable
- Tankless service or flush ports
- Condensate connections
- Recirculation connections
- Drain and relief components
4. Do Not Rely Only on Pipe Temperature
Touching a pipe is not a reliable way to determine whether it is the cold inlet. The cold-side pipe close to a hot storage tank can become warm because of heat migration. Recirculation systems, recent hot-water use and unusual pipe routing can also make pipe temperature misleading.
Manufacturer labels, connection diagrams and confirmed pipe routing provide stronger evidence than whether a pipe feels warm or cool. Avoid touching pipes that may be hot enough to cause burns.
What Does a Water Heater Shut-Off Valve Look Like?
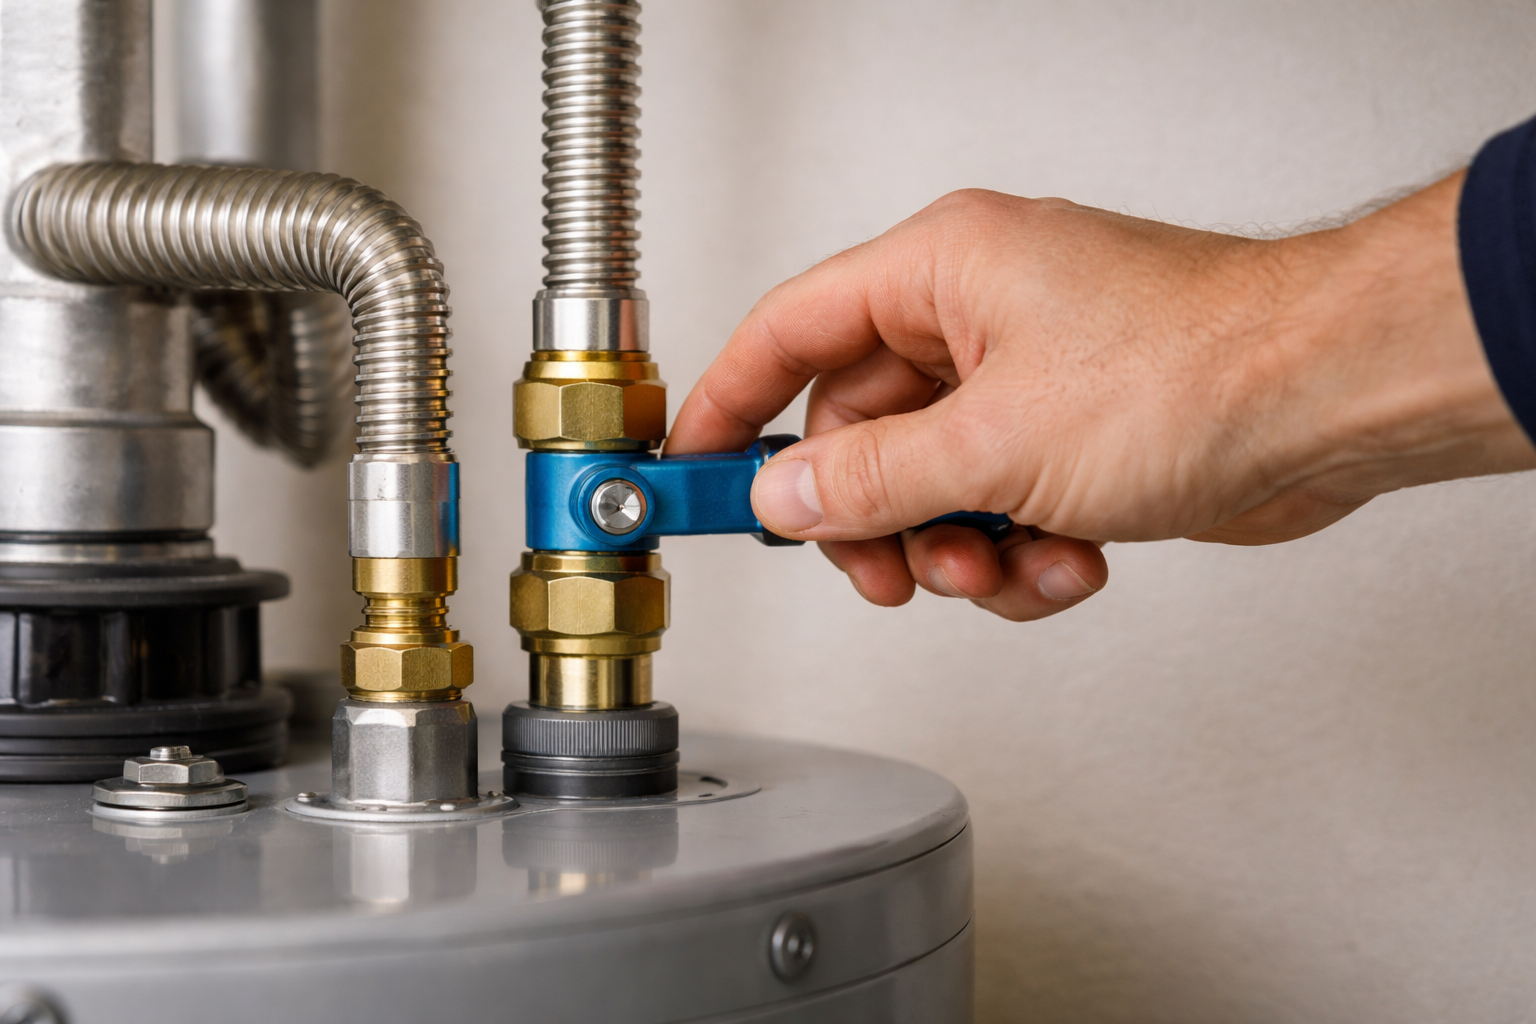
The dedicated water shut-off does not have one universal appearance. Common designs include lever-operated valves and round multi-turn valves. Tankless systems may use purpose-built isolation-valve assemblies, while some newer systems may include automatic shut-off actuators connected to leak sensors.
Handle shape alone does not confirm what a valve controls. A similar-looking lever may be installed on a water line, gas line or another plumbing branch, so identify the connected pipe before operating it.
| Valve appearance | Typical operation | Important limitation |
|---|---|---|
| Lever-operated valve | Usually operates through a quarter turn. A handle parallel with the pipe generally indicates open, while a perpendicular handle generally indicates closed. | A lever can also be installed on a gas line or another plumbing branch. Identify the pipe first. |
| Round multi-turn valve | Commonly closes by turning clockwise and opens by turning counterclockwise. | A round handle does not prove that the valve is a gate valve or that it serves the water heater. |
| Tankless isolation valve | Often uses a lever and may be installed beside a capped service port beneath the unit. | Tankless systems may have separate cold-side and hot-side isolation valves. Confirm the cold inlet marking. |
| Automatic shut-off valve | May use a powered actuator connected to a leak sensor or equipment control. | Operation, manual override and reset procedures are model-specific. |
If a valve is corroded, leaking, damaged or difficult to move, do not force it solely because the handle appears to be in the open position. Excessive force can damage the handle, stem, valve body or connected piping.
Water Heater Shut-Off Valve Location by System Type
The same general principle applies across most residential systems: the water shut-off is installed on the cold-water supply. However, the physical arrangement changes by heater design.
| Water-heater type | Likely water-valve location | Other controls or connections nearby |
|---|---|---|
| Gas storage tank | On the cold-water pipe above, beside or near the tank inlet | Gas appliance shut-off, gas control, drain valve and T&P relief valve |
| Electric storage tank | On the cold-water branch near the top or side inlet | Dedicated breaker or disconnect, drain valve and T&P relief valve |
| Heat-pump water heater | On the cold-water supply near the tank connection | Electrical circuit, condensate drain and model-specific controls |
| Gas tankless | Usually beneath or beside the unit on the connection marked cold or inlet | Hot-side isolation valve, service ports, gas shut-off, electrical supply and a condensate drain on applicable models |
| Electric tankless | Near the cold inlet beneath or beside the unit | One or more dedicated electrical circuits and model-specific disconnecting means |
| Point-of-use heater | Inside a sink cabinet, utility enclosure or near the small heater | Local electrical supply and fixture-specific plumbing connections |
Which Valve or Control Does What?
A water heater may have separate water, fuel and electrical controls. Each performs a different function. Closing one does not automatically shut off the others.
| Valve or control | What it controls | Typical location | What it does not do |
|---|---|---|---|
| Cold-water inlet valve | Stops new supply water from entering the heater | On the cold-water branch near the equipment | Does not empty stored tank water or automatically shut off gas or electrical power |
| Main water shut-off | Stops incoming water to most or all of the home | Location varies and may be near the meter, service entry, basement, garage or exterior supply point | Does not shut off gas or electrical power |
| Gas appliance shut-off | Isolates the appliance gas supply when correctly identified and operated | On the gas supply line serving the heater | Does not stop water from entering the heater |
| Breaker or electrical disconnect | Disconnects electrical power when correctly identified and operated | At the electrical panel or near the equipment where a local disconnect is installed | Does not isolate the water supply |
| Drain valve | Provides an outlet used during draining or service procedures | Near the bottom of a storage tank | Does not stop incoming water unless the cold supply has been isolated separately |
| T&P relief valve | Relieves excessive temperature or pressure as a safety function | Mounted on the storage tank and connected to a discharge pipe; exact position varies by model | It is not the normal water shut-off and should never be treated as one |
Critical safety distinction
Do not confuse the cold-water inlet shut-off with the temperature-and-pressure relief valve. The T&P valve is an essential safety device connected to a discharge pipe. It is not intended to isolate the heater’s water supply, and its discharge path must not be blocked or fitted with a shut-off valve.
Which Water Valve Should You Close During a Leak?
If water is actively escaping from the heater or its nearby plumbing, close the dedicated cold-water inlet valve when it is clearly identified, safely accessible and operable without excessive force. This stops additional supply water from entering the heater.
If the dedicated valve cannot be found, cannot be identified confidently, is inaccessible or will not operate safely, use the home’s main water shut-off. Do not spend time turning unidentified controls beside a leaking heater.
Closing the cold-water inlet may not make the visible leak stop immediately. A storage-tank water heater can still contain water after its supply has been isolated.
Remember: A shut-off valve isolates the supply. It does not empty the water already stored inside a tank.
If water continues escaping after the inlet valve has been closed, possible explanations include:
- Stored water is still draining through the damaged tank, valve or fitting.
- The dedicated shut-off valve does not seal completely.
- The valve operated was not the cold-water inlet valve.
- A connected recirculation or unusual plumbing arrangement is continuing to supply water.
- The leak is coming from plumbing outside the isolated water-heater branch.
For help distinguishing the possible sources, see the complete guide to finding and responding to a leaking water heater.
What If the Shut-Off Valve Will Not Turn?
A valve may become difficult to operate because of corrosion, mineral deposits, internal wear, a damaged handle, stem problems or long periods without movement. Do not use excessive leverage, strike the handle or attempt to dismantle a valve while the plumbing remains pressurised.
If the valve does not move with normal hand pressure:
- Stop before damaging the handle, valve stem, valve body or connected pipe.
- Use the main water shut-off during an active leak when it is safe to reach.
- Keep people away from hot water and wet electrical equipment.
- Have the dedicated valve inspected or replaced by a qualified plumber.
A corroded, damaged or leaking shut-off valve deserves attention before an emergency occurs. It may be addressed during professional water heater service, while routine inspection and preparation can be included in a practical water heater maintenance schedule.
If you smell gas, leave the area
A suspected gas leak requires a different response from a water leak. Do not remain beside the heater searching for controls, operate lights or electrical switches, use a phone inside the building or create a flame.
Leave the building and contact the gas supplier or emergency services from a safe location. Review the U.S. Consumer Product Safety Commission gas-leak safety guidance for the underlying safety advice.
What to Do If You Cannot Find the Water Heater Valve
If the dedicated cold-water inlet valve is not immediately visible, check the connection marked COLD or INLET and trace that supply pipe away from the heater. The valve may be directly above the unit, beside it, farther along an exposed branch line or included in a tankless isolation-valve assembly.
During an active leak, do not continue searching indefinitely or operate unidentified handles. If the dedicated valve cannot be confidently identified, safely reached or operated with normal hand pressure, use the home’s main water shut-off.
Simple fallback rule
Use the dedicated cold-water inlet valve when it is clearly identified and safely operable. Use the main water shut-off when the dedicated valve is missing, inaccessible, stuck or uncertain.
Places the Dedicated Valve May Be Overlooked
The valve should remain accessible under applicable installation requirements, but it may not be immediately visible from the front of the heater. Depending on the plumbing layout, look:
- Above a storage tank near an exposed supply branch
- Beside the heater on a horizontal section of pipe
- Inside an openable utility or plumbing access panel
- Near the entrance to a water-heater closet
- Near a side-mounted cold-water connection
- Beneath or beside a wall-mounted tankless heater
- Within a paired tankless isolation and service-valve assembly
- Along the dedicated branch line in an adjacent utility area
- At a powered automatic shut-off device connected to a leak sensor
Do not remove permanent finishes, dismantle insulation, reach behind wet electrical equipment or move a heavy appliance during an active leak merely to continue searching. Use the main water shut-off when reaching the local valve would create another hazard.
Emergency Decision Guide: Which Control Should You Use?
The correct response depends on whether the immediate problem involves escaping water, suspected gas, electrical equipment or a combination of hazards. A valve that stops water does not automatically stop fuel or electrical power.
| Situation | Primary response | Safety boundary |
|---|---|---|
| Water leaking from the heater or a nearby connection | Close the clearly identified cold-water inlet valve when it is safely accessible. | Avoid hot water, steam, standing water and wet electrical components. |
| Dedicated valve cannot be found or identified | Use the home’s main water shut-off. | Do not experiment with unidentified water, gas, relief or service valves. |
| Dedicated valve is stuck, damaged or leaking | Stop applying force and use the main water shut-off if needed. | Excessive leverage can damage the valve, stem or connected piping. |
| Gas odour or suspected escaping gas | Leave the building and contact the gas supplier or emergency services from a safe location. | Do not operate switches, phones, flames or appliance controls inside. |
| Water has reached wiring or electrical controls | Stay away from the wet equipment and obtain qualified assistance. | Do not touch wet appliances or stand in water while reaching for electrical controls. |
| Tankless service or maintenance | Follow the isolation and shutdown sequence in the exact model manual. | The hot valve, cold valve, service ports, gas valve and power control perform different functions. |
| No active emergency | Identify, photograph and label the correct valve before it is needed. | Have a corroded or uncertain valve evaluated rather than forcing it as a test. |
Safe Response to an Active Water-Heater Leak
The immediate goal is to stop additional supply water from entering the damaged heater without exposing anyone to scalding water, electricity or gas.
- Keep away from immediate hazards. Do not step into standing water near wiring, powered appliances, disconnects or electrical panels. Avoid contact with hot water and steam.
- Identify the cold-water inlet valve. Use the heater’s markings, known pipe routing or an existing valve label rather than handle shape alone.
- Close the inlet valve when safe. Use normal hand pressure only. Stop if the handle, stem or connected pipe appears damaged.
- Use the main shut-off when necessary. Use it when the local valve cannot be found, identified, reached or operated safely.
- Keep the damaged heater out of service. Do not continue using a visibly leaking or damaged unit while awaiting diagnosis.
- Arrange the appropriate inspection. Depending on the hazard, this may require a plumber, electrician, gas technician or utility representative.
Do not automatically open a hot-water faucet as a universal emergency step. A faucet may release dangerously hot water, does not drain a storage tank and does not prove that every part of the system is depressurised. Draining, depressurising and restarting procedures should follow the instructions for the exact water-heater model and the conditions at the installation.
Water and electricity require extra caution
Do not touch a wet water heater, electrical disconnect or appliance control while standing in water. Wet electrical equipment should be evaluated before being returned to service.
Why Is Water Still Leaking After the Valve Is Off?
A continued leak does not automatically mean the cold-water valve failed. Closing the inlet stops or reduces new supply water, but it does not remove water already stored in a tank.
Stored Water Is Still Leaving the Tank
A storage water heater remains full or partly full after the cold-water supply is closed. If the tank shell, drain valve or a low plumbing connection has failed, gravity can allow stored water to continue escaping.
The Shut-Off Valve Is Not Sealing Completely
An older valve may appear closed without creating a complete internal seal. Mineral deposits, wear or internal damage can allow a reduced flow of supply water to pass through it.
The Wrong Control Was Operated
The handle may belong to the hot-water line, gas supply, tankless service port or another nearby plumbing branch. Confirm that the closed valve is connected to the heater’s marked cold-water inlet.
A Recirculation or Unusual Piping Arrangement Is Involved
Some systems include hot-water recirculation piping, crossover connections, mixing equipment or multiple isolation valves. These arrangements can make water movement less obvious than in a basic storage-tank installation.
The Water Is Coming From Somewhere Else
The apparent leak may originate from an overhead pipe, heat-pump condensate drain, nearby appliance, roof penetration or unrelated plumbing connection rather than from the heater itself.
Use the dedicated guide to identify the likely source of a water-heater leak. If the tank body itself has failed, repair is usually less practical than replacement, making it useful to compare the likely water heater replacement cost.
What If There Is No Visible Dedicated Shut-Off Valve?
A missing, concealed or shared valve should not be declared a code violation from appearance alone. The installation may have been built under a different adopted code, altered over time or arranged in a way that is not immediately visible.
As a current model-code example, Section 503.1 of the 2024 International Plumbing Code calls for a cold-water branch valve located near the water heater, serving only that equipment, remaining accessible from the same floor level and not disrupting the cold-water supply to the rest of the system. Actual legal requirements depend on the code edition and amendments adopted by the local jurisdiction.
Have the installation evaluated when:
- No dedicated cold-water valve can be found
- The apparent valve also shuts off unrelated fixtures
- The valve is concealed behind permanent construction
- The valve cannot be reached without moving or dismantling equipment
- The only visible shut-off appears to be on the hot-water outlet
- The valve or nearby piping is heavily corroded
- The existing valve does not stop incoming water
- The piping arrangement cannot be identified confidently
How Location Changes by Building and Installation Type
The cold-water inlet valve may be arranged differently according to the building and equipment location:
- Apartment or condominium: The heater may have an individual valve inside a utility cabinet or mechanical room, while the building’s main supply may be controlled by management.
- Utility closet: The valve may be above the tank, beside the doorway or on an exposed branch pipe. Stored items should not block access.
- Attic: The valve may be near the inlet connection or equipment platform. Do not cross unsafe attic flooring during an emergency.
- Garage: Look above or beside the heater and on exposed wall or ceiling piping. Confirm that a nearby lever is on a water line rather than a gas line.
- Basement or mechanical room: Several unrelated valves may be grouped together, making labels and pipe tracing especially important.
- Exterior enclosure: The valve may be inside the enclosure or directly beside the cold inlet. Weather exposure and corrosion may make it harder to recognise.
Common Shut-Off Mistakes to Avoid
- Turning the first lever you see: Similar handles may control water, gas or an unrelated plumbing branch.
- Using the T&P valve as a shut-off: It is a pressure and temperature safety device, not a water-isolation valve.
- Opening the drain valve before isolating the supply: The drain outlet does not stop incoming water.
- Forcing a seized handle: This can damage the valve, stem or connected pipe.
- Assuming the leak must stop immediately: Stored tank water may continue escaping.
- Standing in water near powered equipment: Wet wiring and appliances can create a serious shock hazard.
- Operating switches after smelling gas: Leave the building instead of manipulating controls.
- Restarting the heater without checking its condition: A heater that leaked, ran without adequate water or had controls become wet may require inspection first.
- Guessing from pipe temperature: Heat migration and recirculation can make the cold line feel warm.
- Blocking access with stored items: Boxes and shelving can prevent the shut-off from being reached during an emergency.
What to Do After the Water Supply Is Isolated
Once additional supply water has been stopped or reduced, determine what appears to have failed and whether the heater can safely remain out of service until it is inspected.
Look for the Apparent Source From a Safe Position
Possible sources include:
- A flexible connector or rigid pipe joint
- The cold-water shut-off valve
- The hot-water outlet connection
- The T&P valve or discharge pipe
- The drain valve
- A tankless service port
- A heat-pump condensate line
- The tank body or lower seam
- An unrelated pipe above or behind the heater
Do not place your hands near leaking hot water, open electrical compartments or remove burner covers to investigate.
Know When Professional Service Is Appropriate
Professional evaluation is appropriate when:
- The tank shell or lower seam appears to be leaking
- The shut-off valve is damaged or will not close
- Gas piping, combustion equipment or venting may be involved
- Electrical wiring or controls have become wet
- The source cannot be identified
- The heater continues refilling or losing water
- The installation lacks an identifiable accessible valve
- The homeowner is unsure how to isolate the equipment safely
The guide to professional water heater service costs explains common service expenses. Work involving plumbing alterations, gas connections or electrical circuits should also be considered alongside the guide explaining when water-heater work is unsuitable for DIY.
Do Not Restart the Heater Automatically
Do not restore normal operation merely because the visible water has stopped. Restart requirements vary by fuel type and model, and some conditions require inspection first.
- An electric storage heater can be damaged if its heating elements are energised before the tank is completely full.
- A gas heater may require inspection if its burner compartment, controls or gas components became wet.
- A heat-pump water heater may require evaluation if water reached its electrical, compressor or control components.
- A tankless heater may display a fault or require a model-specific restart sequence.
Follow the manufacturer’s instructions for the exact model and obtain qualified service whenever equipment has been submerged, electrically affected or physically damaged.
Identify and Label the Valve Before an Emergency
The safest time to find the shut-off valve is before the water heater begins leaking. A short preparation check can prevent confusion without requiring a homeowner to perform repairs or force an old valve.
- Find the connection marked COLD or INLET.
- Trace the pipe to the dedicated water shut-off.
- Confirm the identification using the exact model manual when needed.
- Take a clear photograph showing the heater and correct valve.
- Add a simple water-resistant label such as WATER HEATER COLD-WATER SHUT-OFF.
- Show other household members where the dedicated valve and main shut-off are located.
- Keep boxes, shelving and stored items away from the access route.
- Visually check for corrosion, moisture, deposits or a damaged handle.
- Have an uncertain or deteriorated valve inspected before it is needed.
Do not force an old valve simply to test it. A valve that has not moved for years may begin leaking or fail when disturbed. Its condition can instead be assessed as part of a planned water heater maintenance schedule.
Water Heater Shut-Off Valve FAQs
Is the water-heater shut-off valve on the hot or cold pipe?
The dedicated supply shut-off is normally installed on the cold-water inlet line. Closing it prevents additional supply water from entering the heater. A valve on the hot outlet does not provide the same supply-isolation function.
Which direction turns a water-heater valve off?
A typical lever-operated valve is generally closed when its handle is perpendicular to the pipe. A typical round multi-turn valve commonly closes clockwise. Identify what the valve controls first, and do not force a damaged or unfamiliar handle.
Where is the shut-off valve on a tankless water heater?
It is commonly beneath or beside the wall-mounted unit on the connection marked COLD or INLET. It may be part of an isolation-valve assembly containing separate hot-side and cold-side valves and capped service ports.
Why is the heater still leaking after I closed the valve?
The tank may still contain stored water, the valve may not be sealing completely, the wrong control may have been operated or another piping arrangement may still be supplying water. Closing the inlet isolates the supply; it does not instantly empty a storage tank.
Does closing the water valve turn off a gas water heater?
No. The cold-water inlet valve controls water rather than gas. A gas-fired heater has separate fuel controls, and many models also require electricity. Follow the exact manufacturer shutdown instructions and do not operate appliance controls when a gas leak is suspected.
Does turning off the breaker stop water from leaking?
No. A breaker or electrical disconnect controls power. It does not stop incoming water. The cold-water inlet valve or the home’s main water shut-off is used to isolate the water supply.
Can a water heater have more than one water valve?
Yes. Tankless systems commonly have separate hot-side and cold-side isolation valves and may also include service ports. Other systems can include automatic shut-offs, recirculation components, check valves or mixing equipment.
What should I do if the valve is behind a wall?
Check for an intended access panel or another accessible point along the cold-water branch. Do not cut into permanent finishes during an emergency. Use the main water shut-off when necessary and have the installation evaluated.
What should I do if I smell gas near the water heater?
Leave the building immediately. Do not operate appliance controls, lights, electrical switches or phones inside, and do not create a flame. Contact the gas supplier or emergency services from a safe location. See the U.S. Consumer Product Safety Commission gas-leak safety guidance.
Should every water heater have its own shut-off valve?
Current model plumbing-code provisions generally call for a dedicated accessible cold-water valve near the water heater. The legally applicable requirement depends on the code edition adopted locally, jurisdictional amendments and the installation’s history. An unclear or older arrangement should be evaluated rather than declared compliant or noncompliant from appearance alone.
Bottom Line
The water heater shut-off valve is normally located on the dedicated cold-water supply line near the equipment. On a storage tank, look above or beside the tank. On a tankless heater, look beneath or beside the unit for the cold-side isolation valve.
Confirm the cold inlet before operating anything. During an active water leak, close the dedicated valve when it is clearly identified and safely operable. Use the home’s main water shut-off when the local valve is missing, stuck, inaccessible or uncertain.
Final rule: Identify the line, identify the control and operate it only when doing so is safe. When gas, electricity or damaged equipment is involved, leave the hazardous area and obtain qualified assistance.